How to deploy your React website to Namecheap cPanel
A very detailed tutorial with step-by-step instructions
If you're a newbie web developer you probably never deployed a website to a web hosting provider before but I'm here to tell you that it is not that difficult and I will show you how to do it step-by-step.
The term deploy means, publishing your updated code from source control to a hosting platform
Let's start! I have chosen Namecheap because, well, the service they provide is...cheap and good and I have experimented with it.
I assume that you have already purchased your domain name and hosting with Namecheap so, I will not cover that here.
Step 1
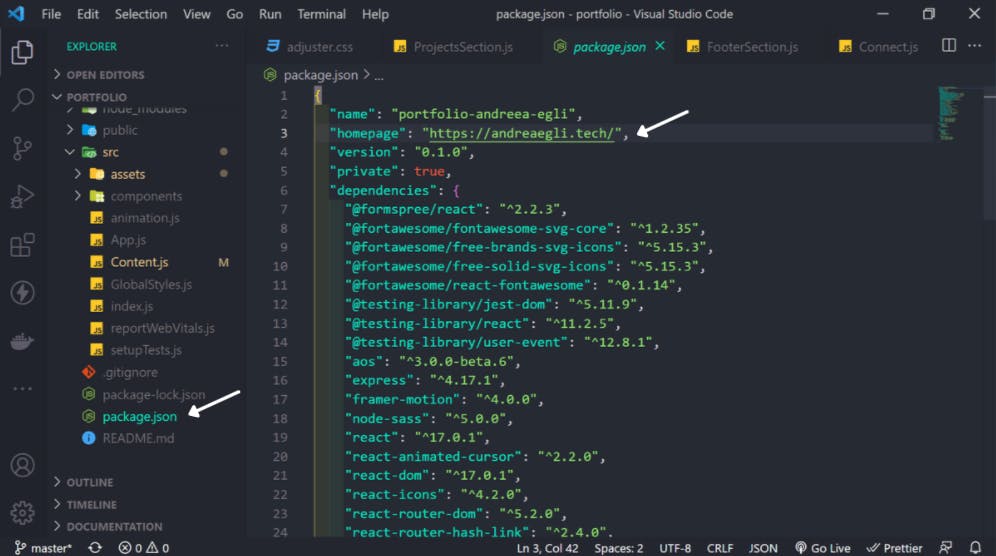
First of all, open your project in VS Code and navigate to package.json file and add the URL to the project homepage. Make sure that you add your own URL and not mine 😄 Attention! This is a mandatory step and must not be skipped otherwise your deployment will not work.
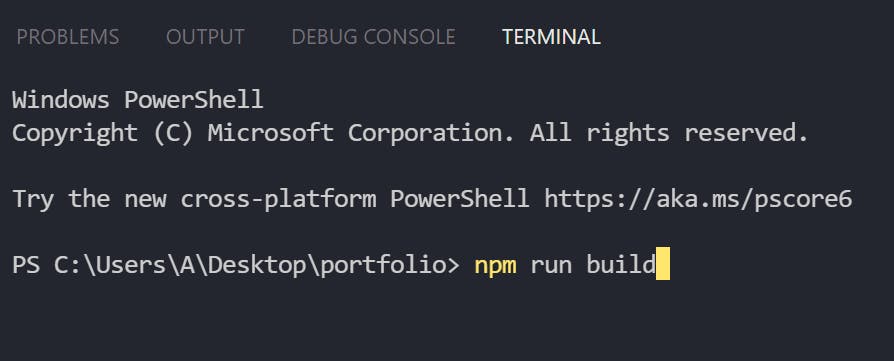
Prepare your build folder - in VS Code terminal run the command
npm run build
and wait for the build process to be completed.
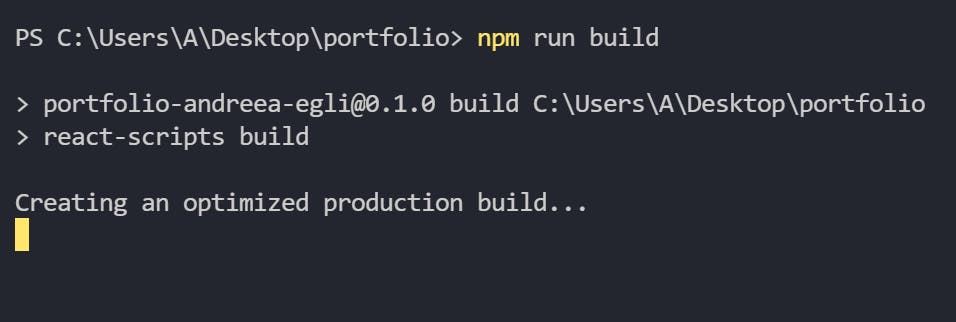
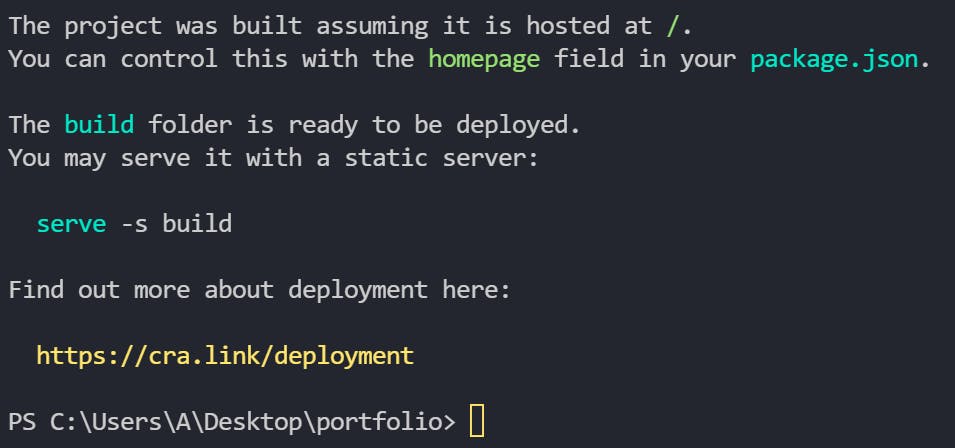
Once the folder has been created, you will find it a the top of the folder tree in your project:
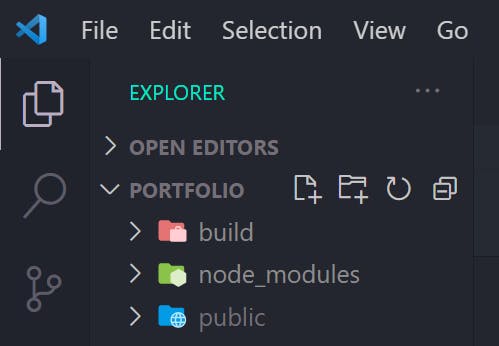
Right-click on it and click on the 'Reveal in File Explorer' tab which will take you to the build file location on your local machine.
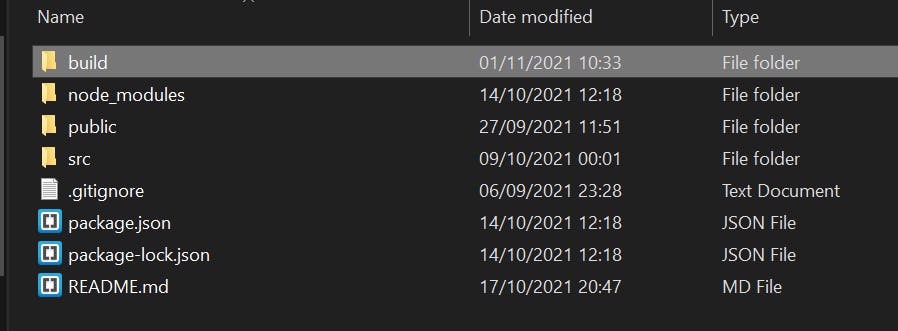 Right-click on the build folder (again) -> Send to -> Compressed (zipped) folder and you are good to go!
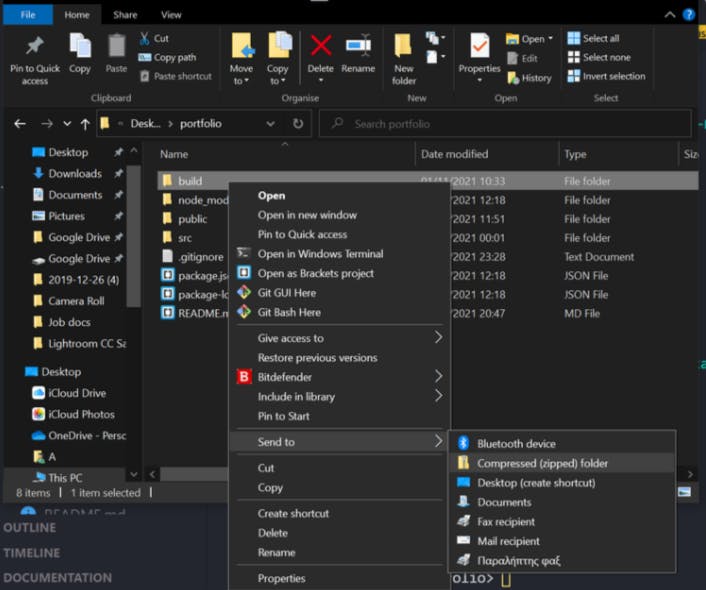
Your build folder is ready to be uploaded to Namecheap 🎉🥳
Step 2
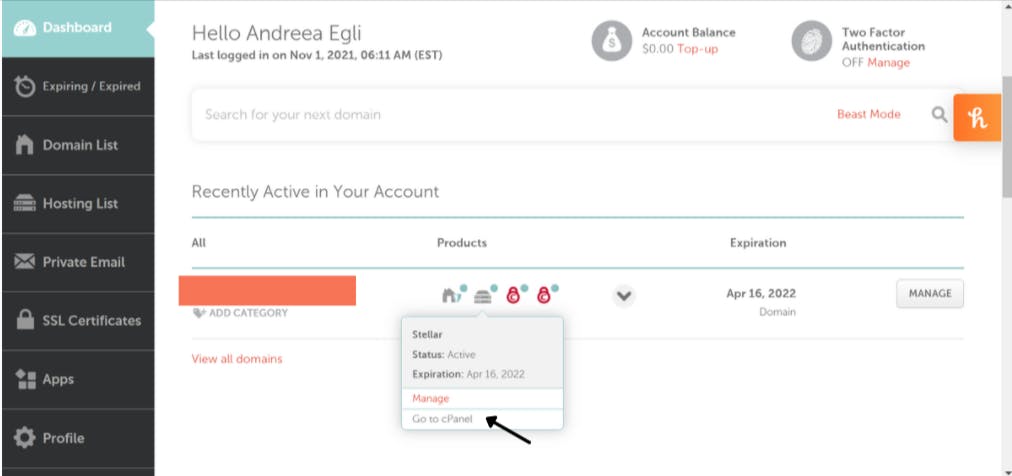
Now, let's log in to Namecheap. Once logged in, go to your Dashboard where you'll see all your domain names. Chose the one you want to deploy to and hover over the second icon under the Products column and click 'Go to cPanel':
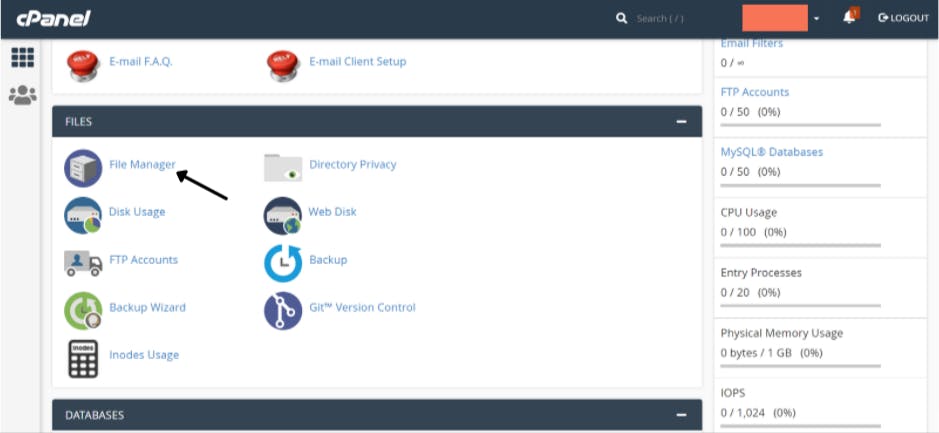
From here, find the 'FILES' section and click on 'File Manager'
 You will be prompted to the cPanel File Manager screen.
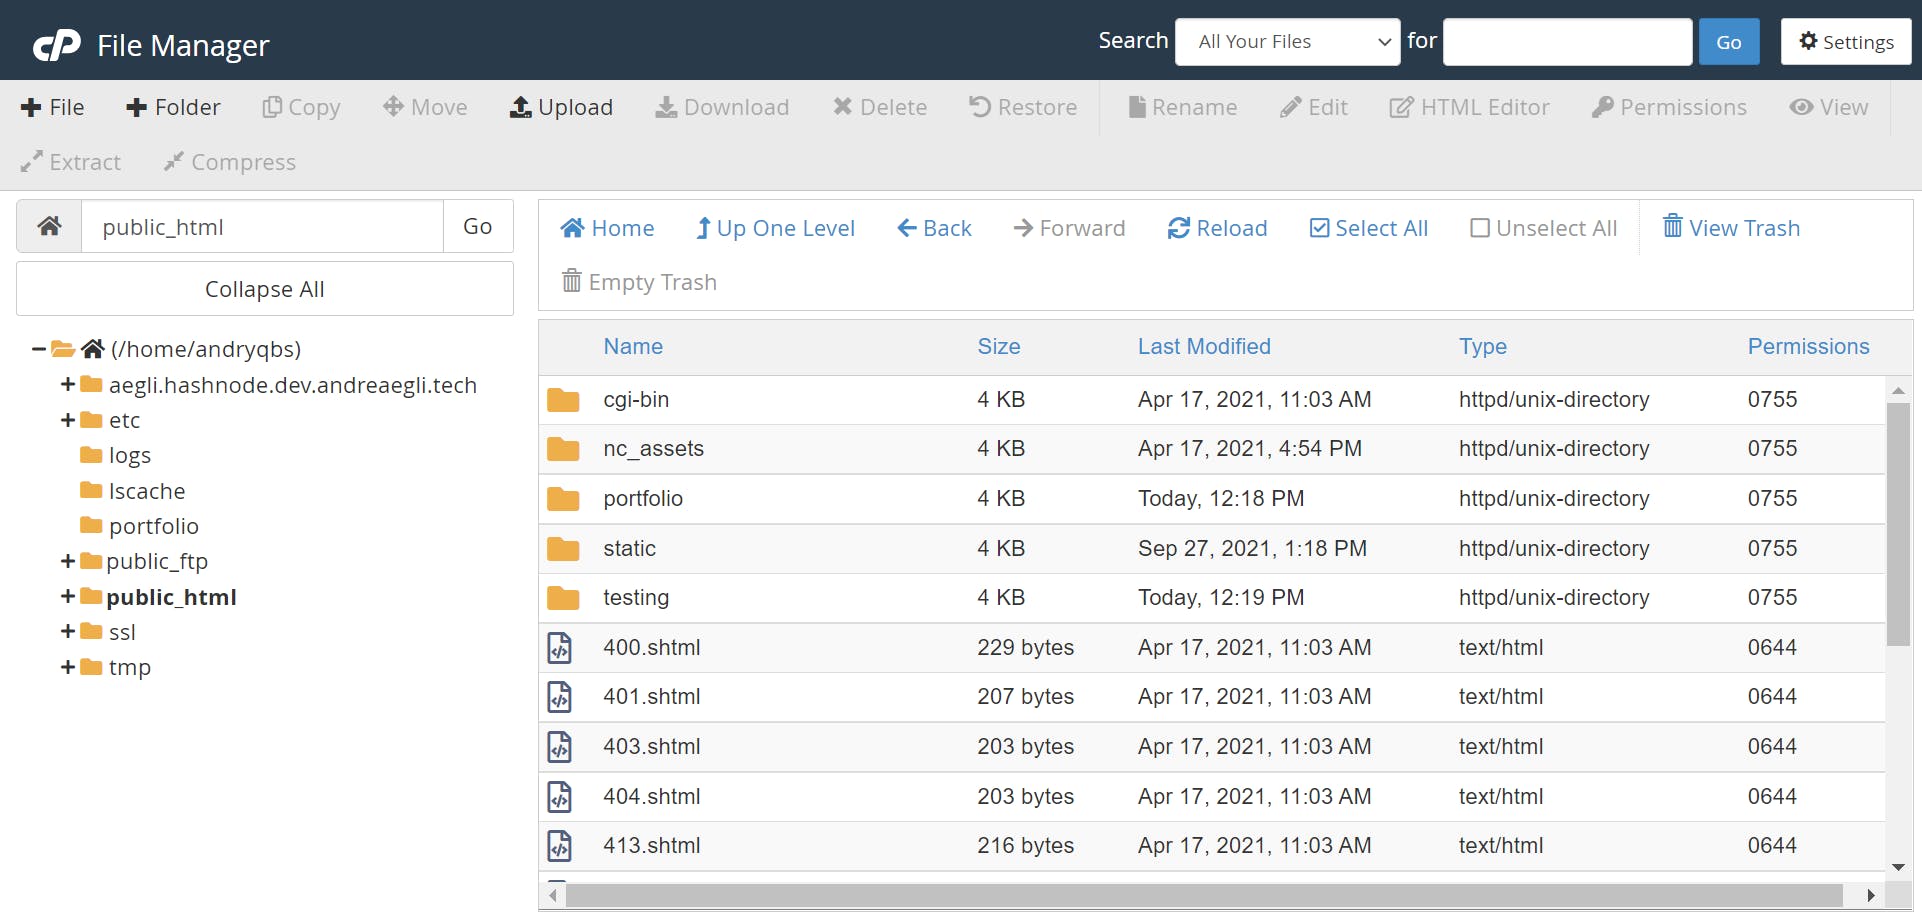
Navigate to public_html on the left-hand side, click on it, and a new folder from the + Folder tab on the top navigation bar. Name the folder whatever you want, it is not important. This is where you'll be uploading and extracting your build folder.
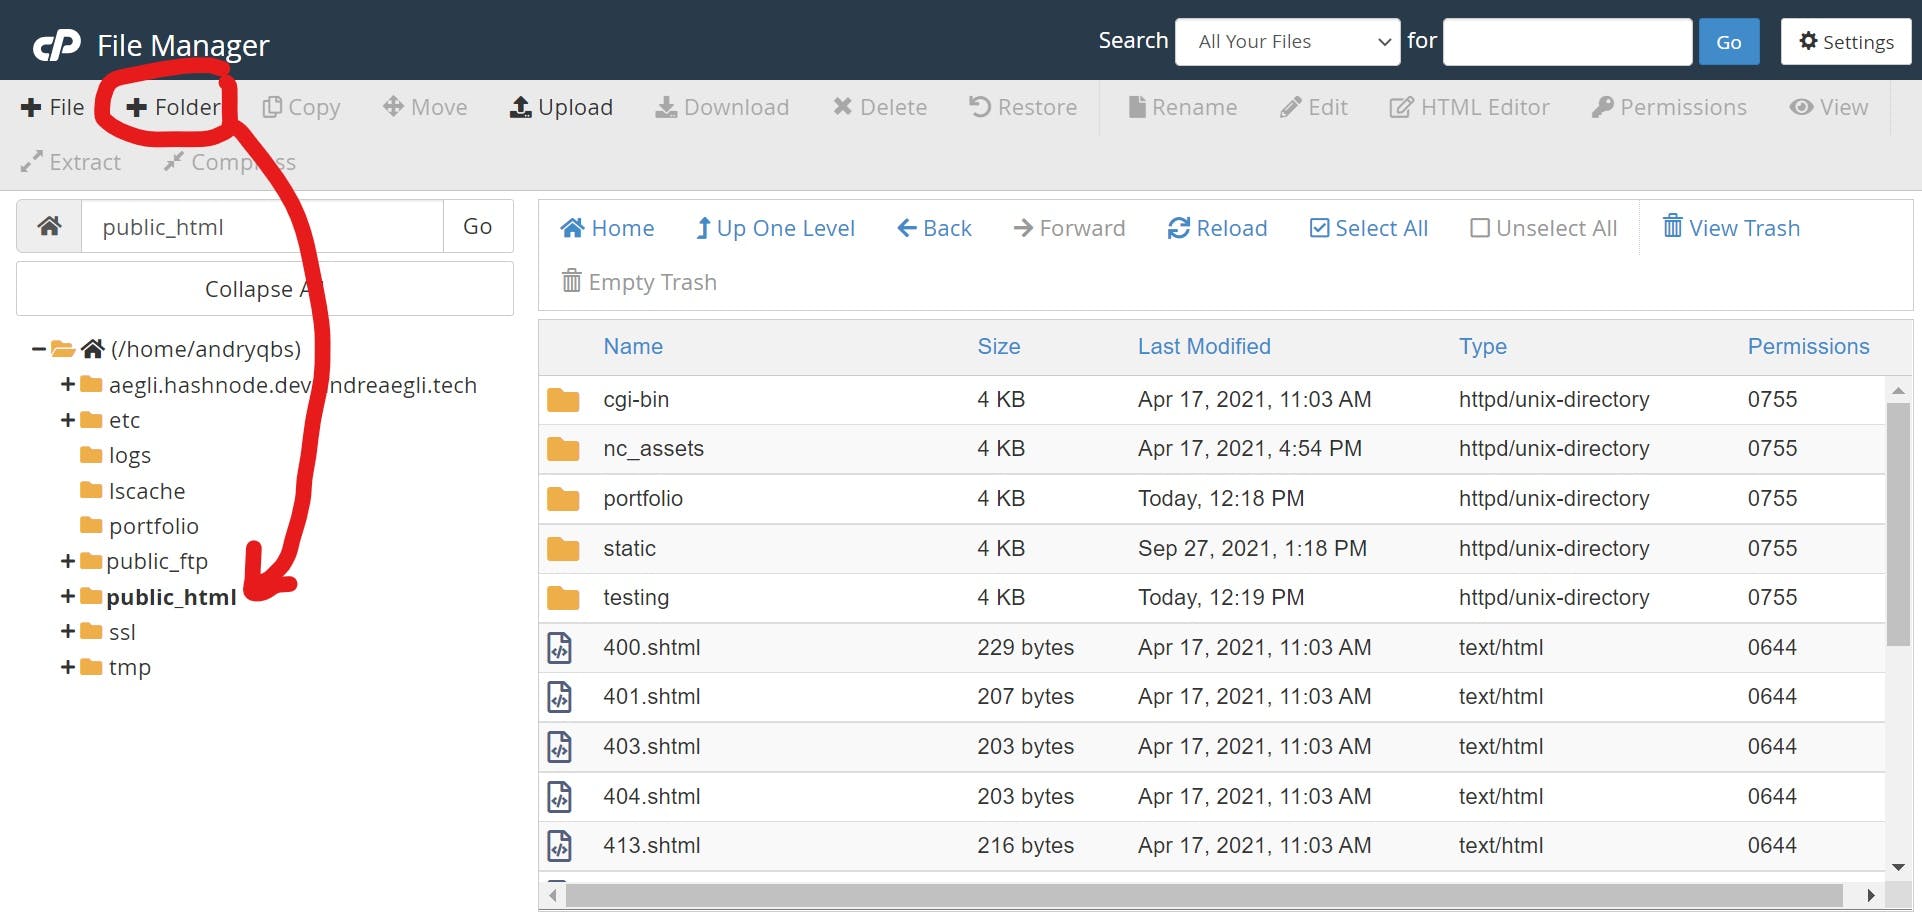 Mine is named portfolio because it relates to my project which is my portfolio website.
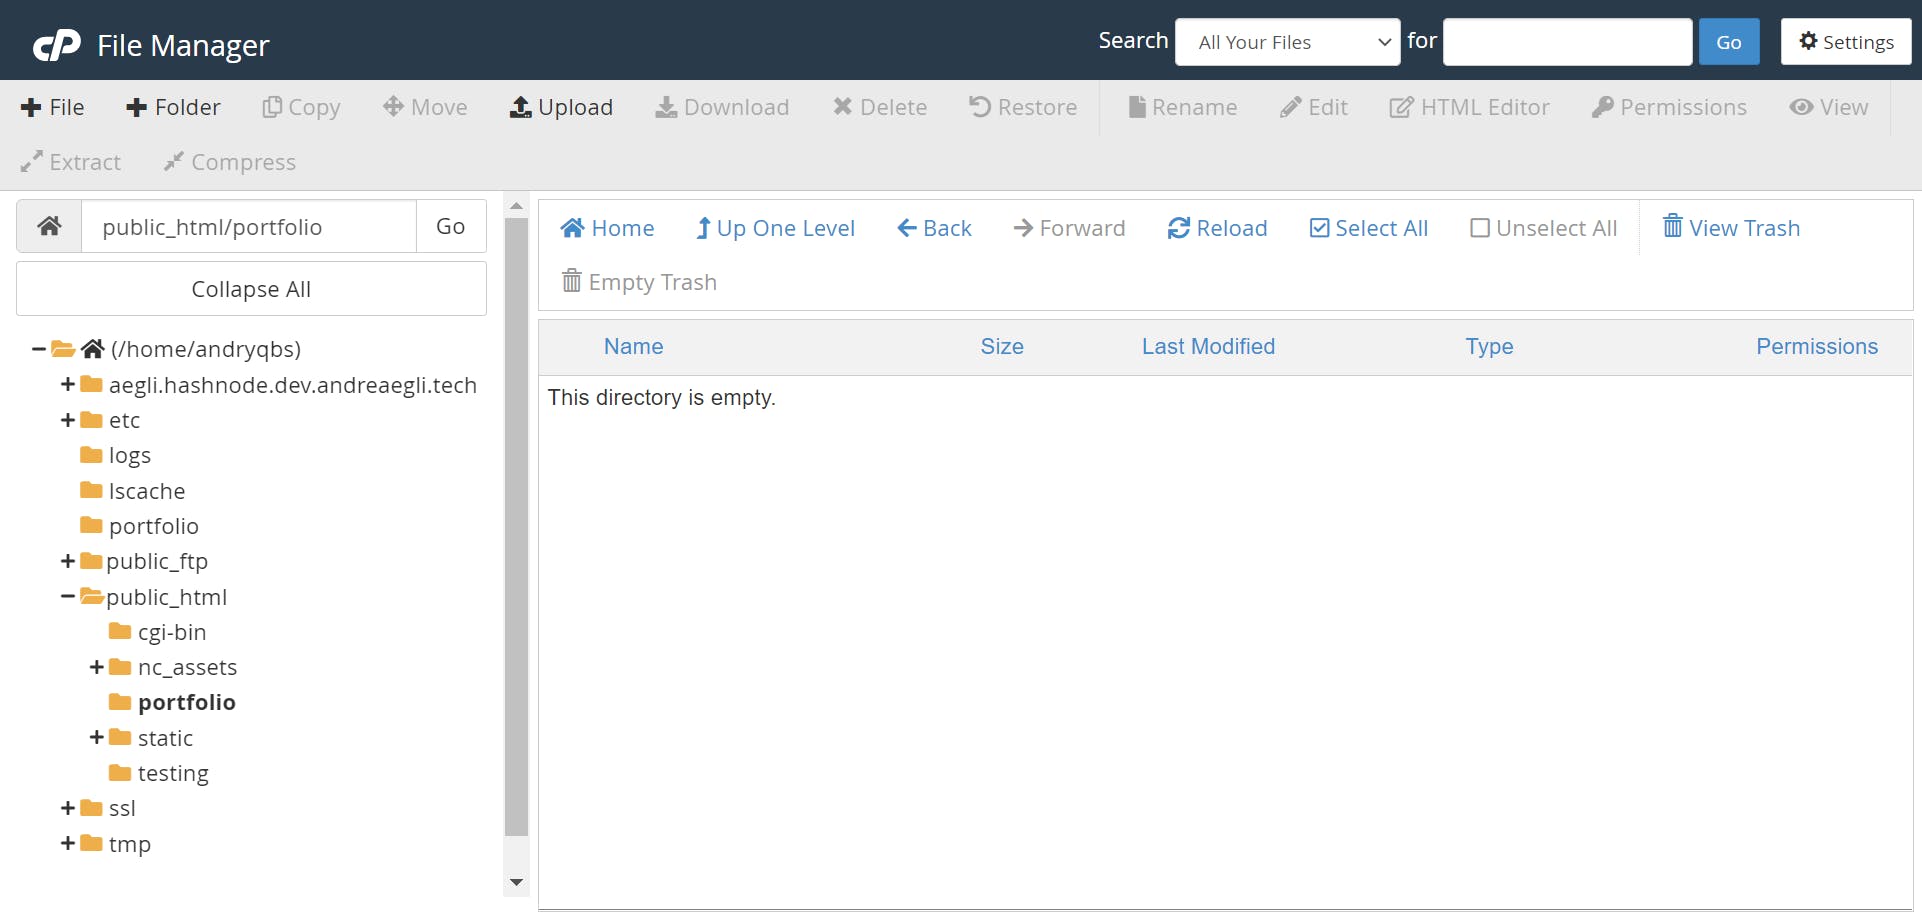
Ok, let's finally upload the build zip folder. Follow the steps shown in the next images:
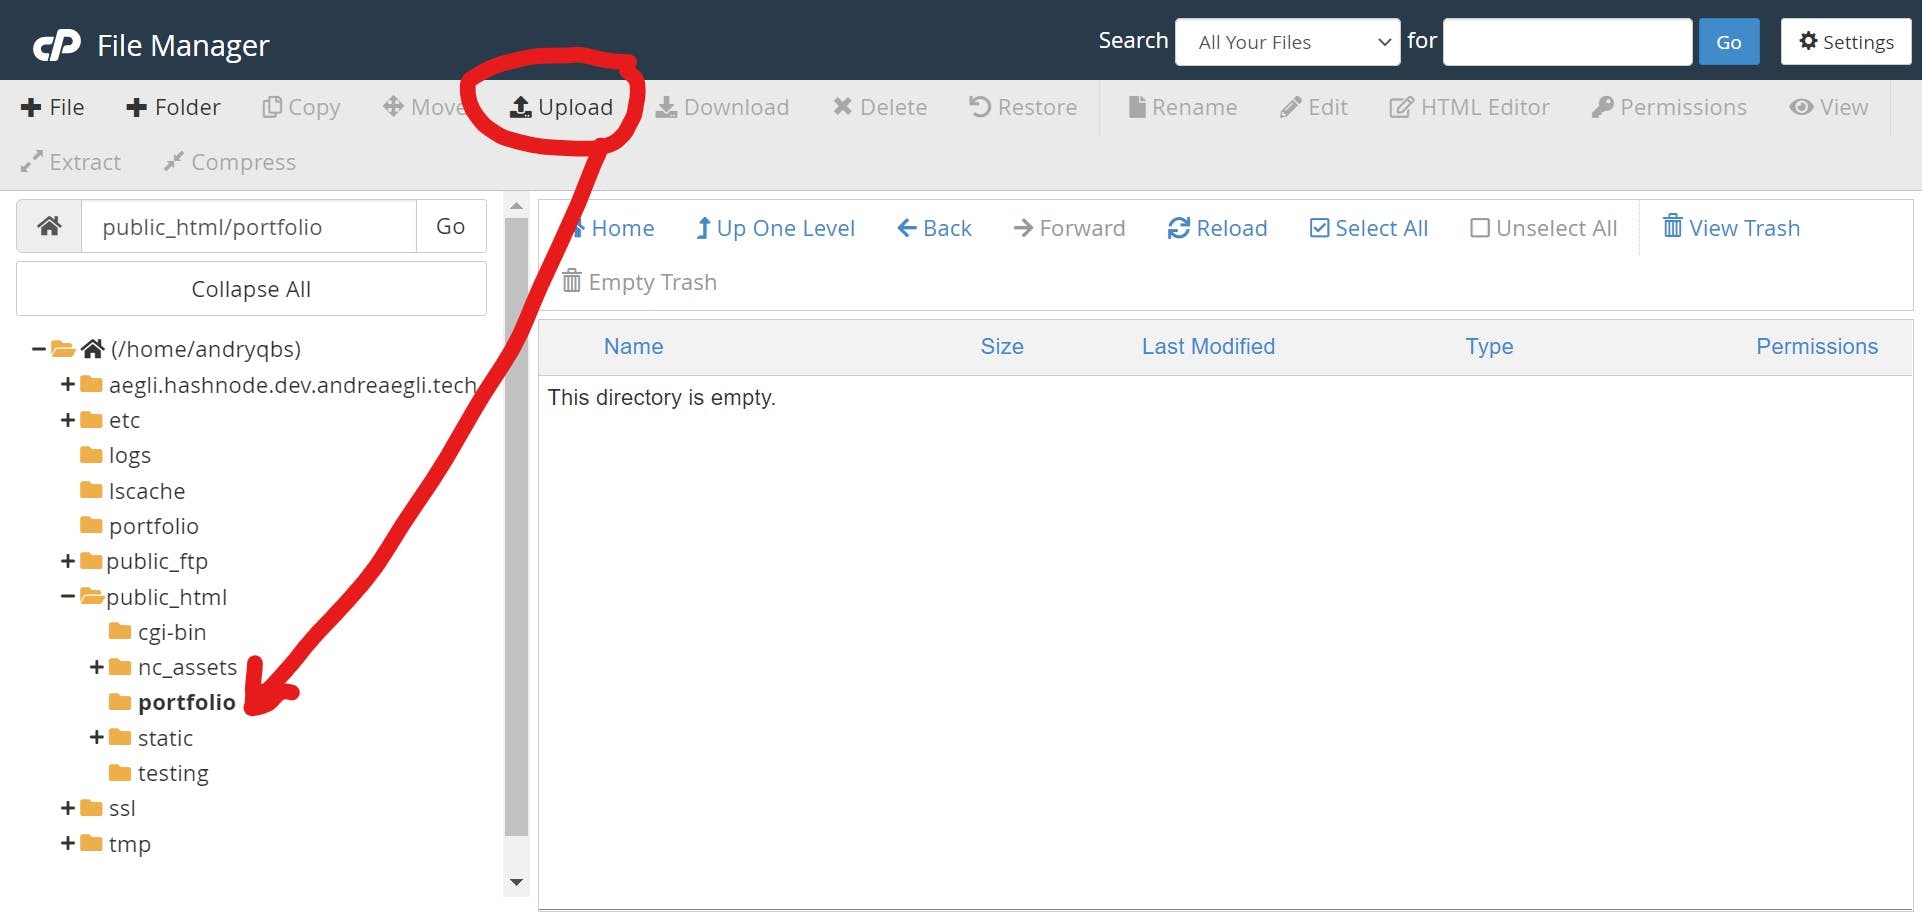
Click on the folder you have created and hit the + Upload tab on the top navigation bar:
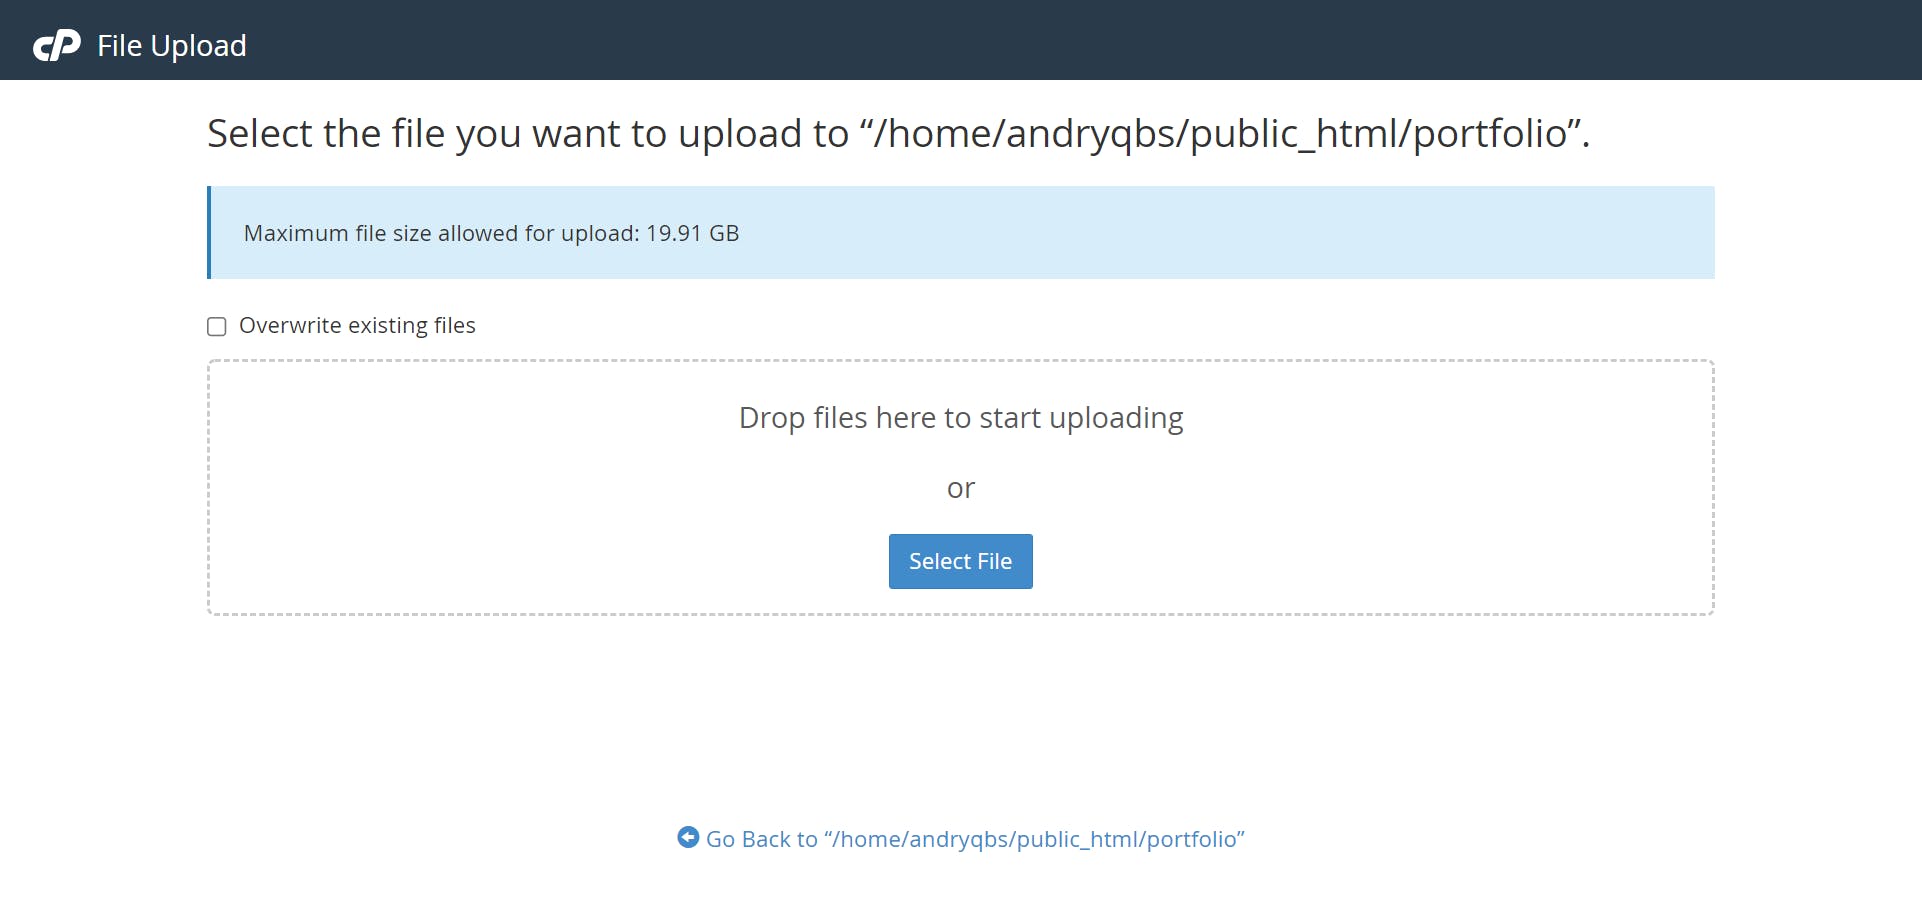
Drop or Select your build zip folder and wait for the upload process to be completed:
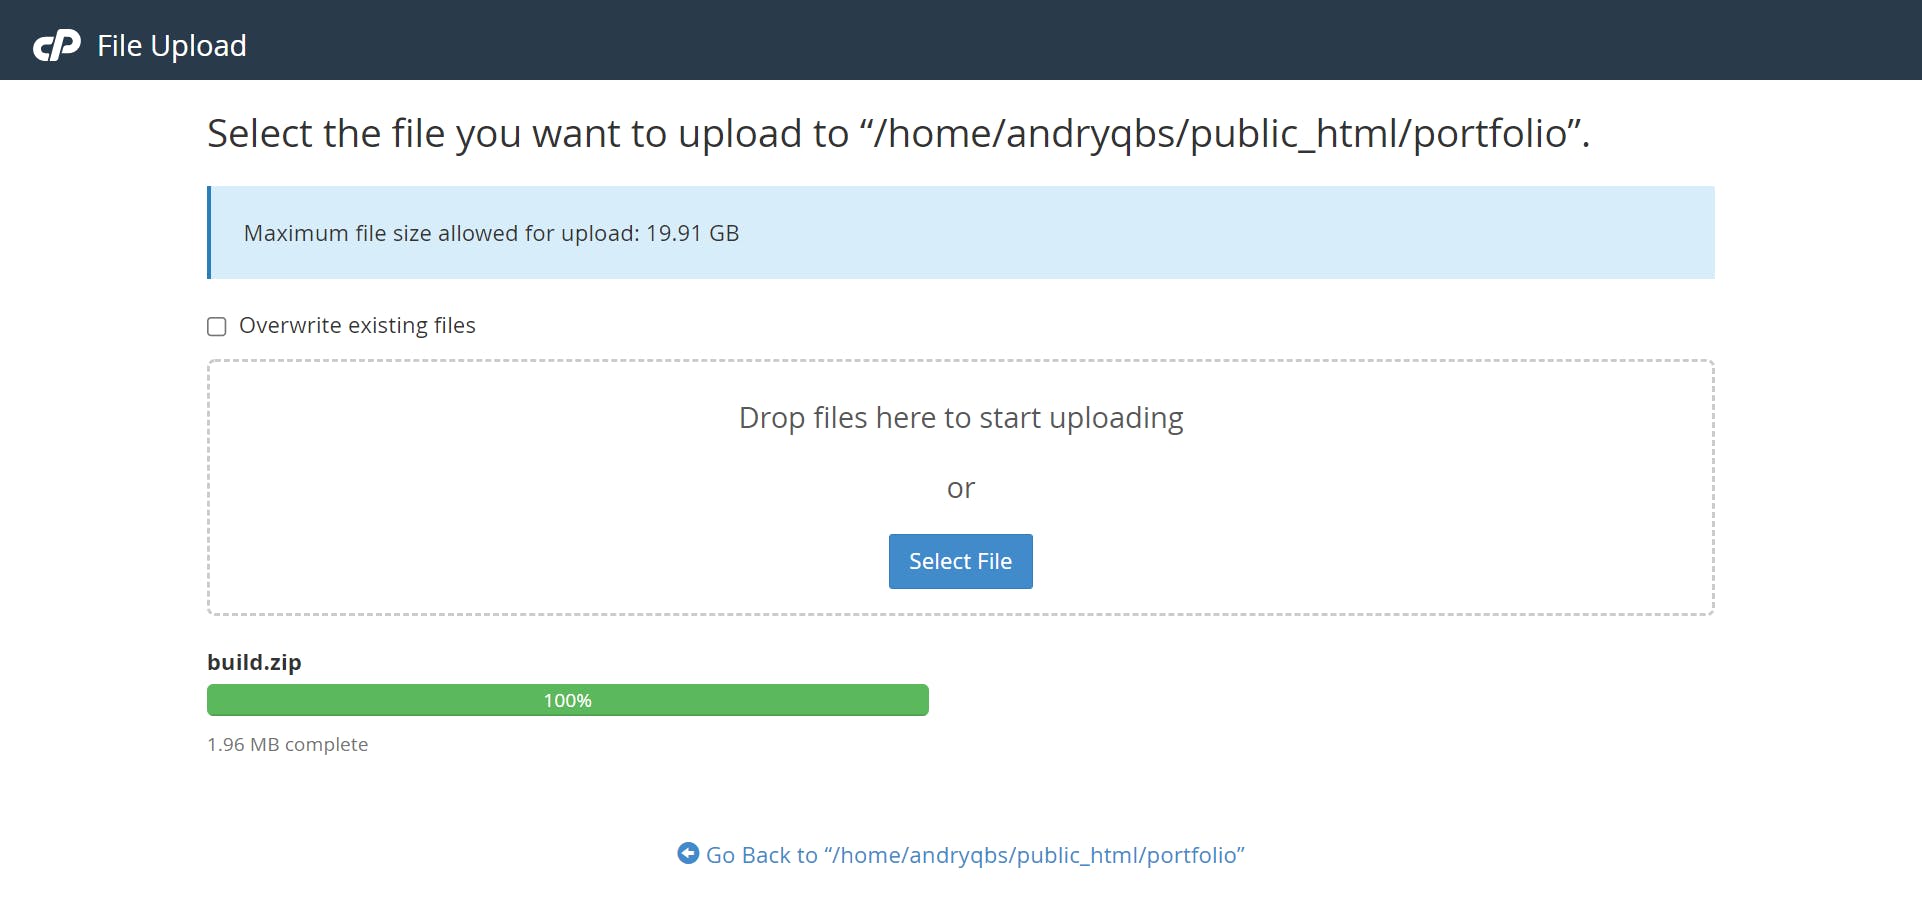
Once the process is completed, click on the bottom link to go back:
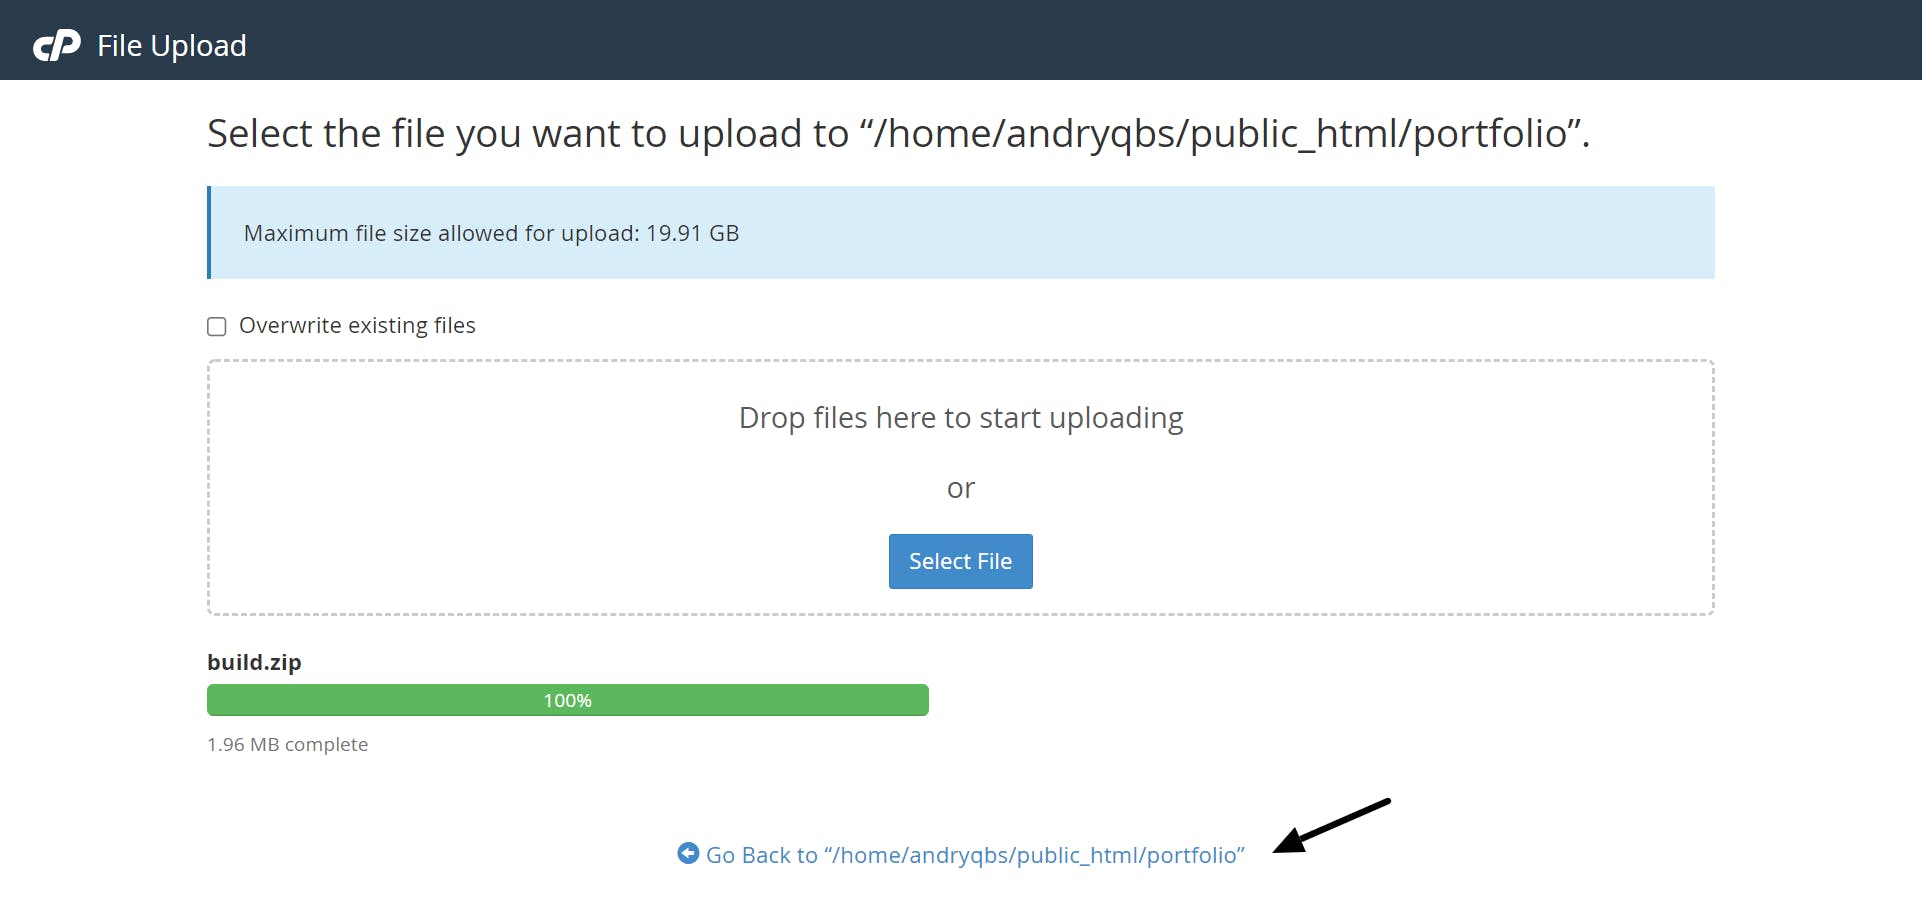
You will be redirected to the folder where your build file has been uploaded to
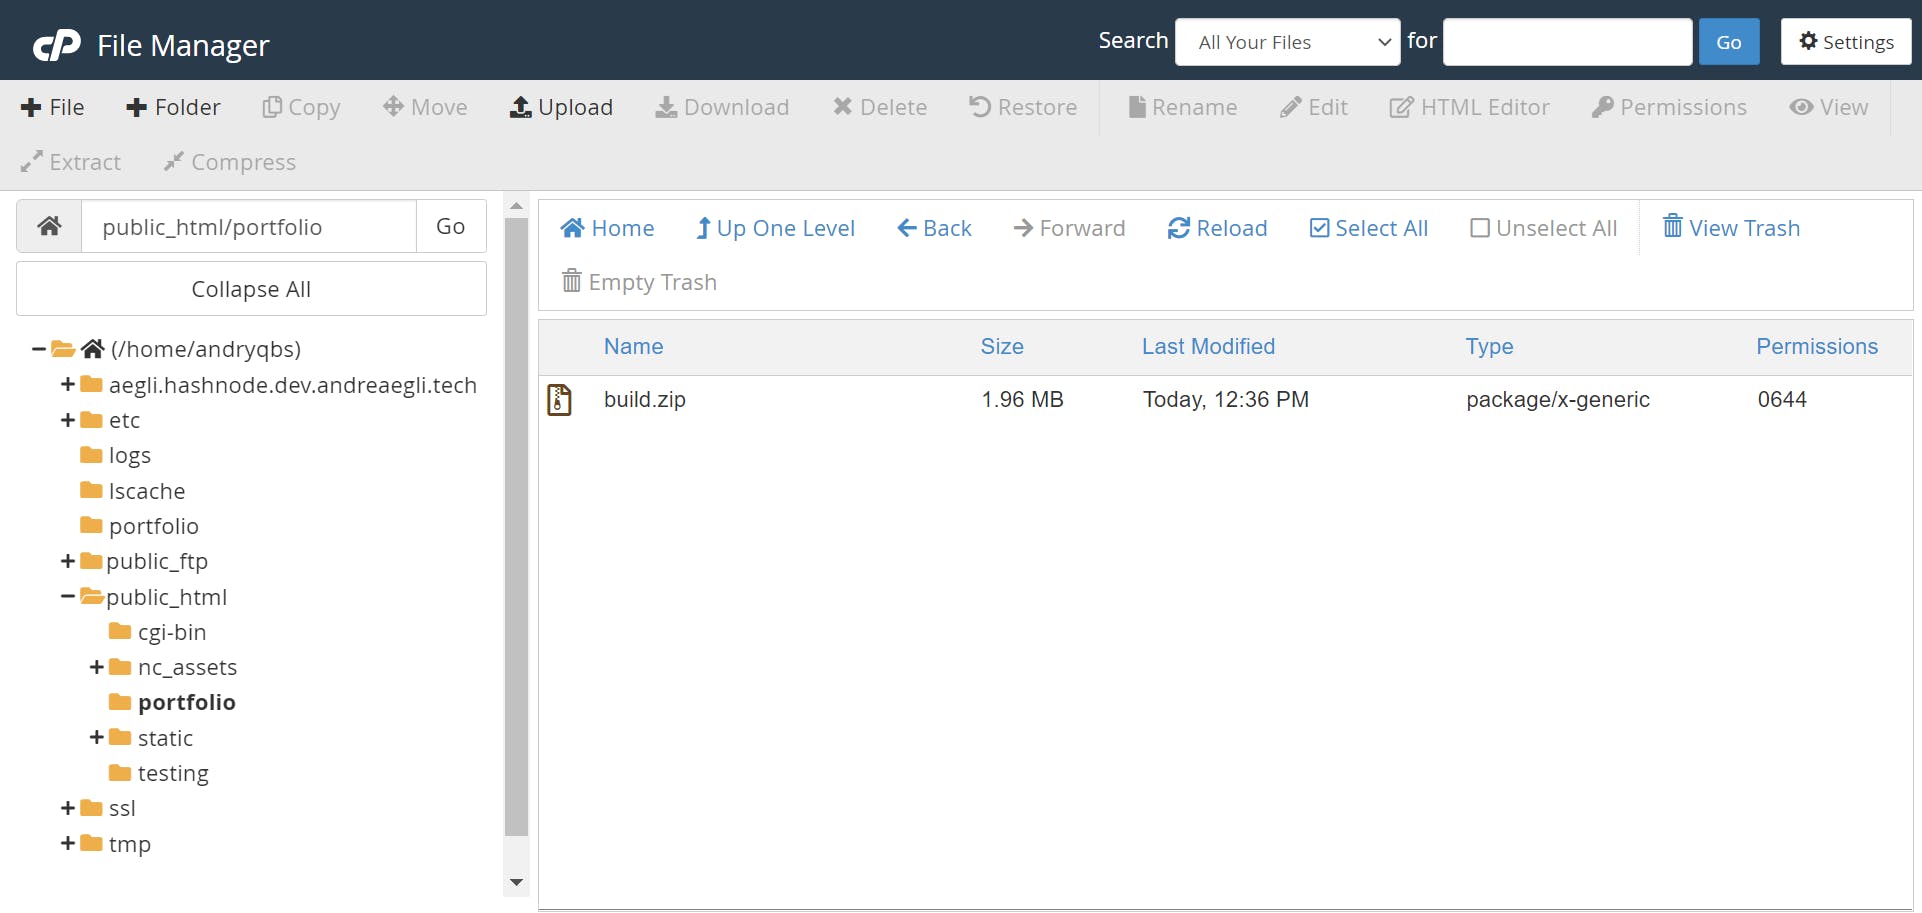
Click once on the build.zip and hit the Extract tab on the navigation bar. Click Extract File(s) button. You have unzipped your build folder!!!
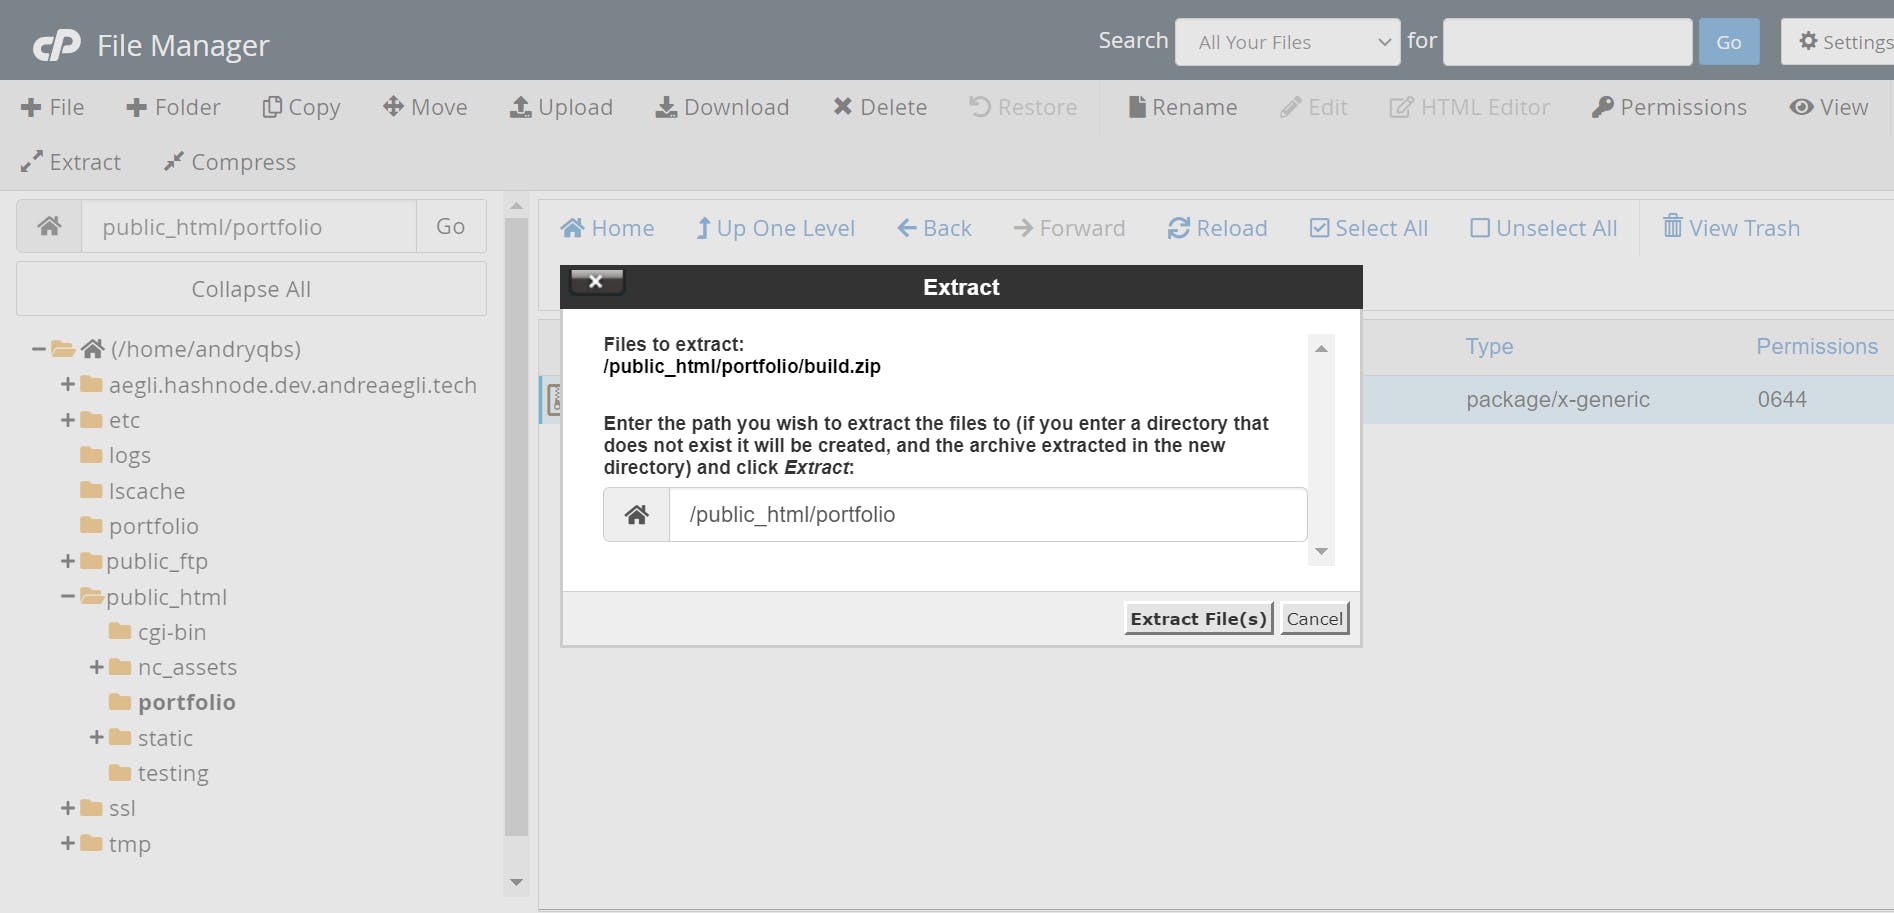
Bear with me, we're getting closer to the end...⏰
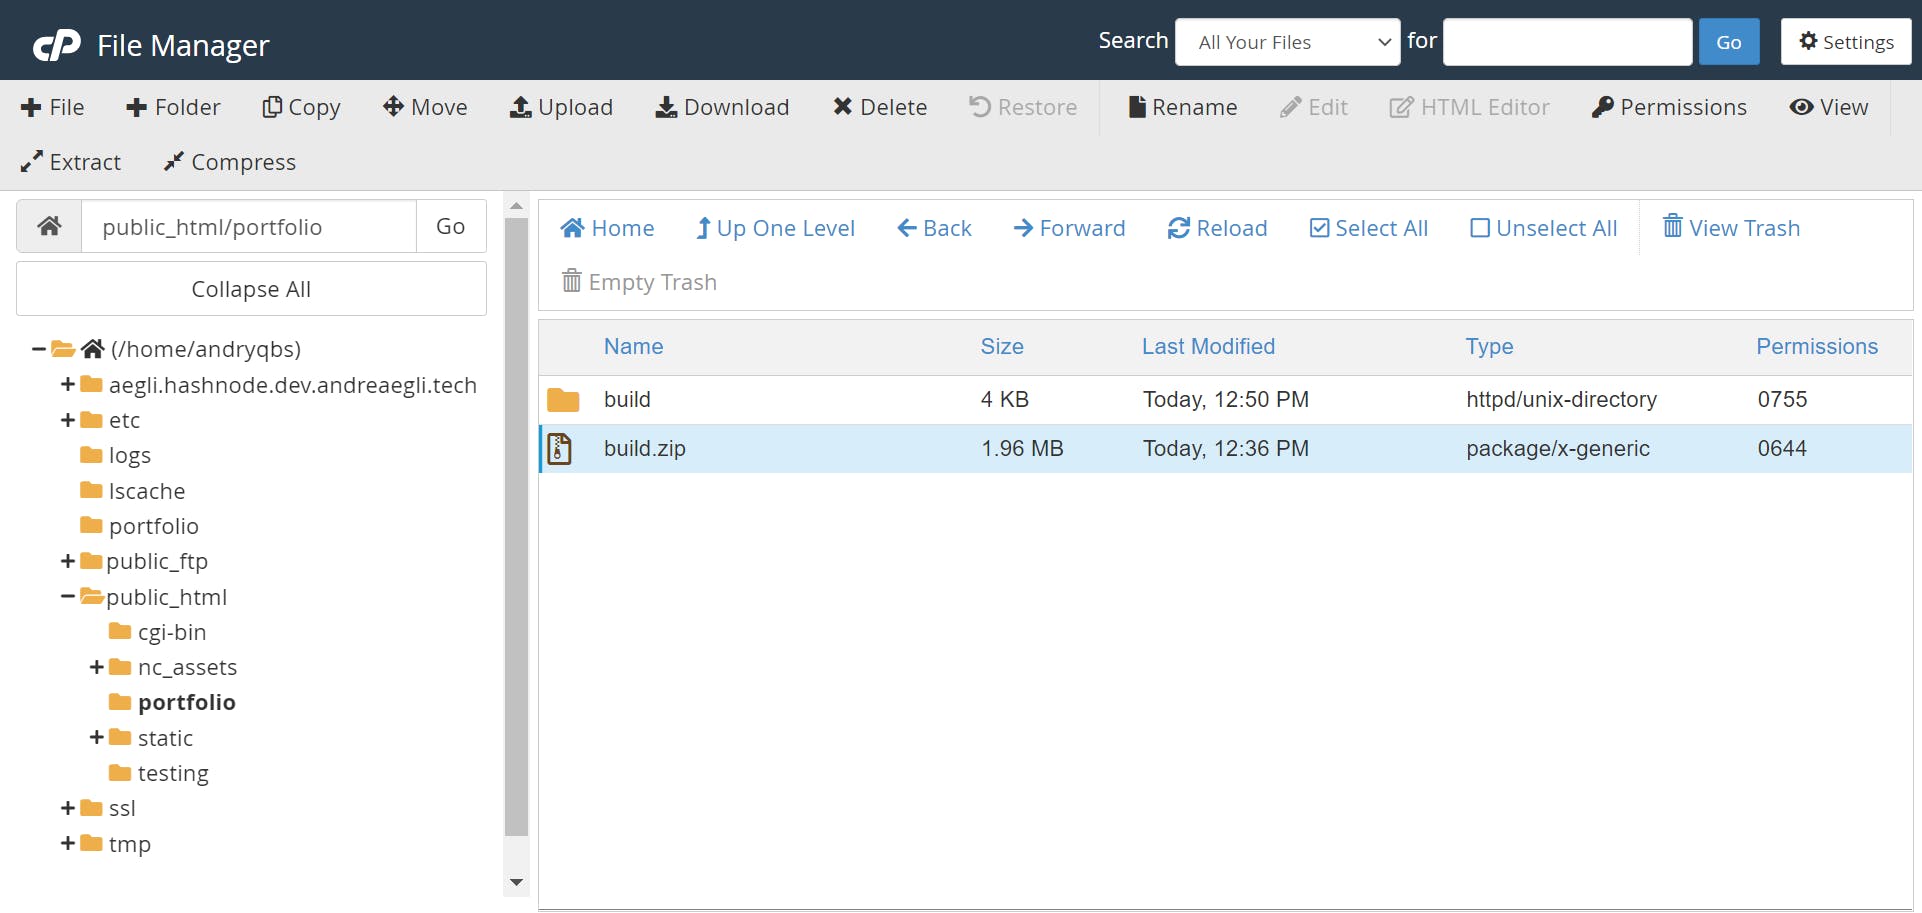
At this point, you can delete the build.zip folder and keep (of course 😅) the extracted version.
Double-click on the build folder to reveal the files (and sub-folders) and Select All
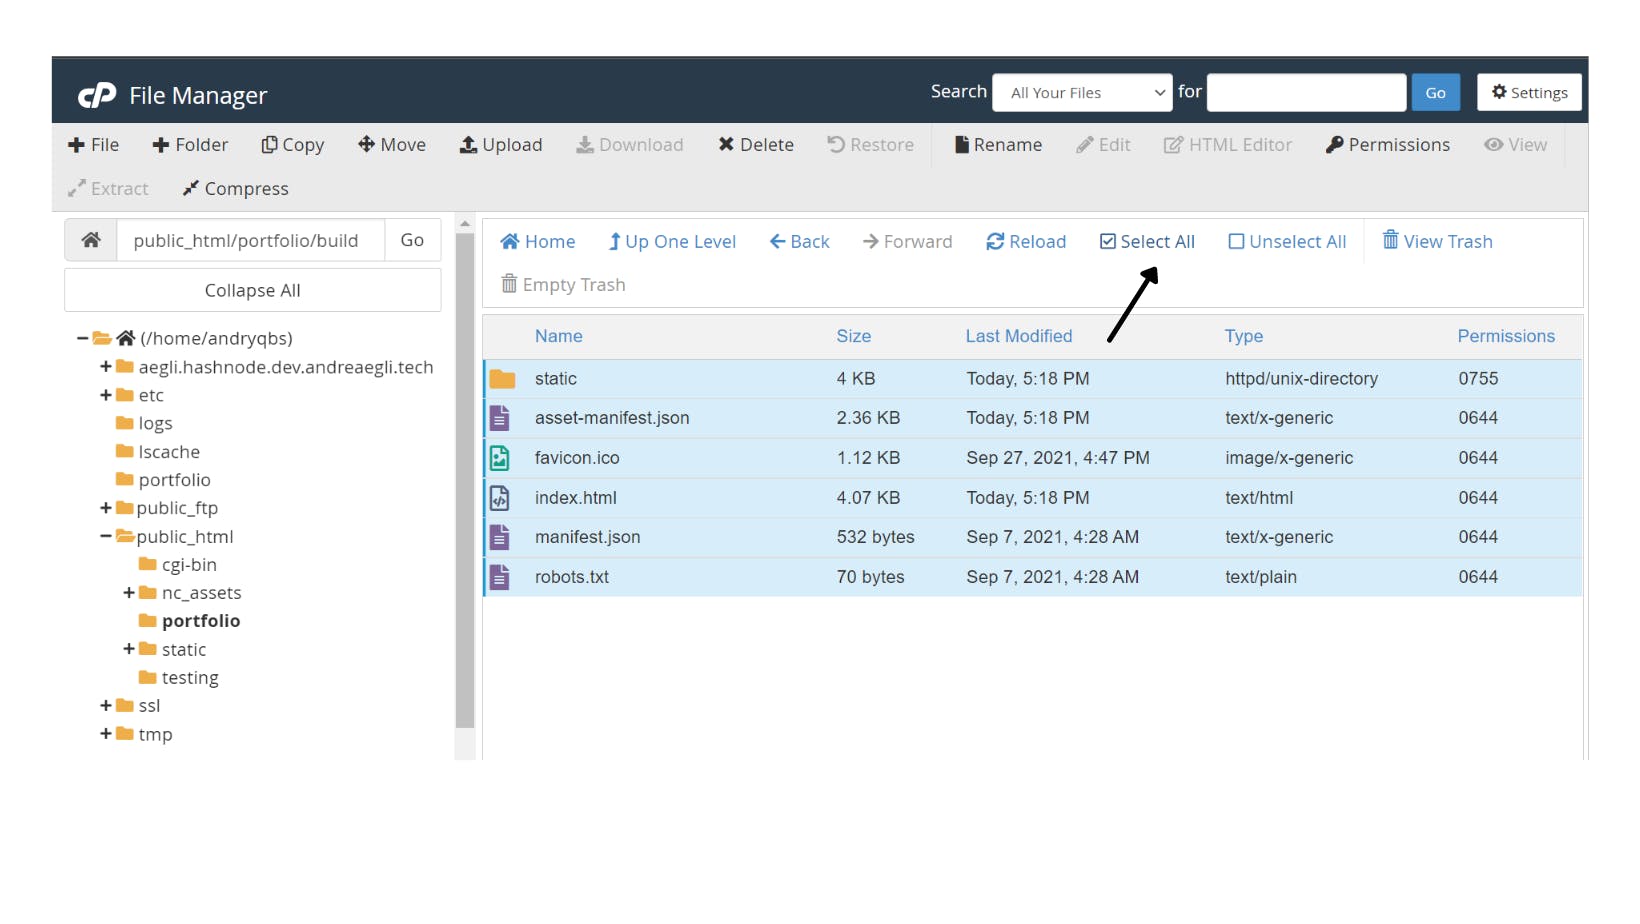
Once selected, hit the Move tab on the navbar.
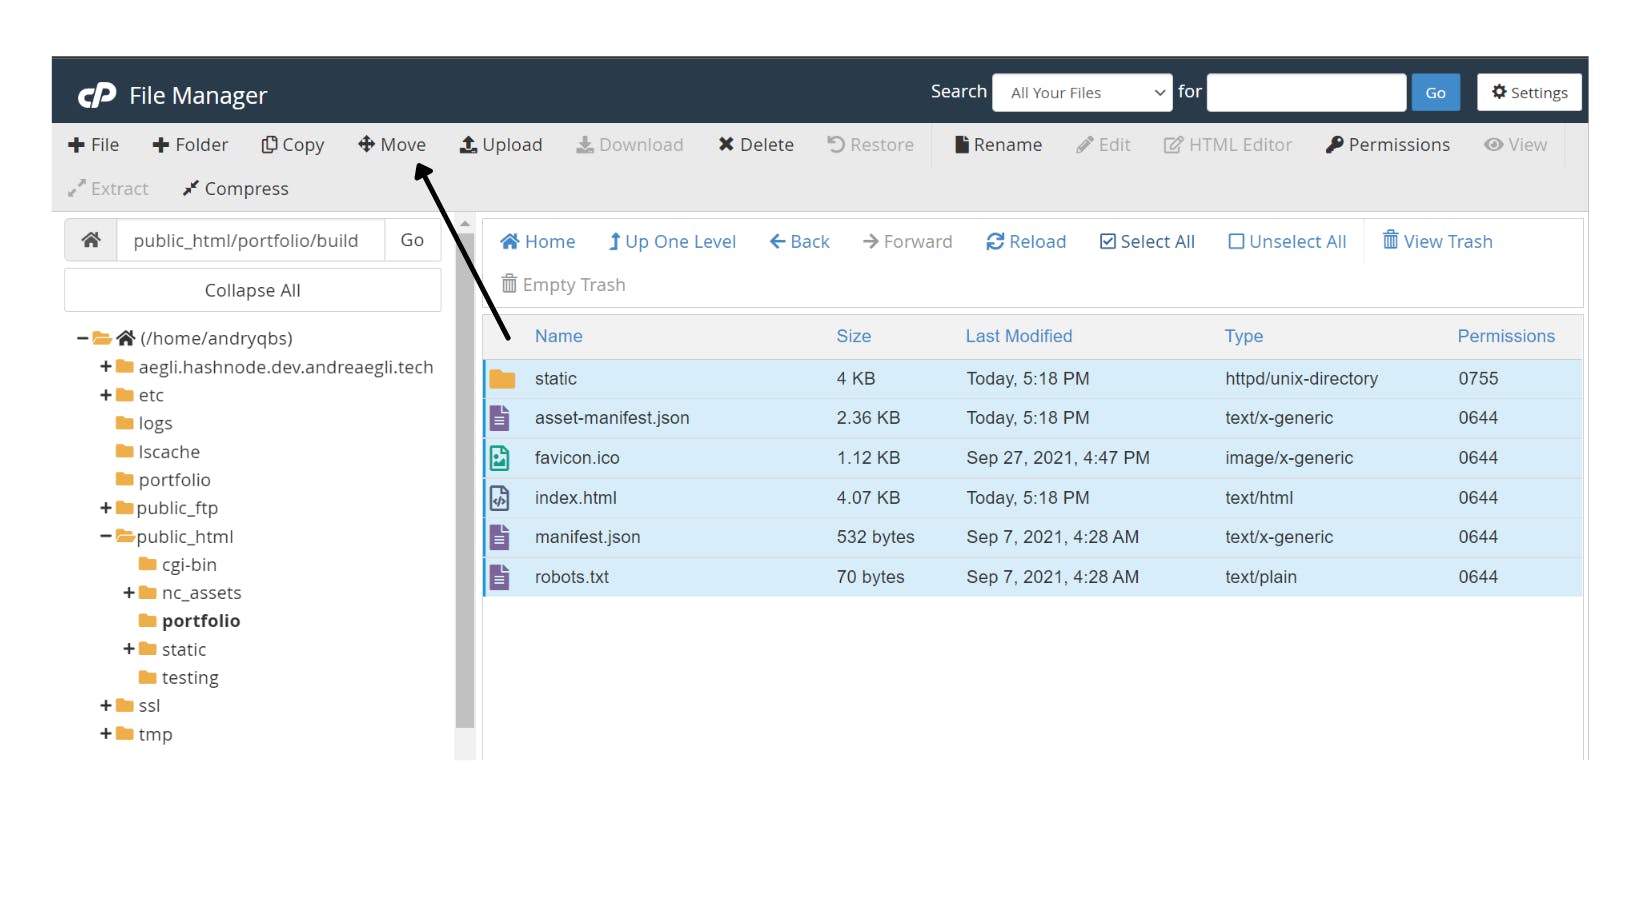
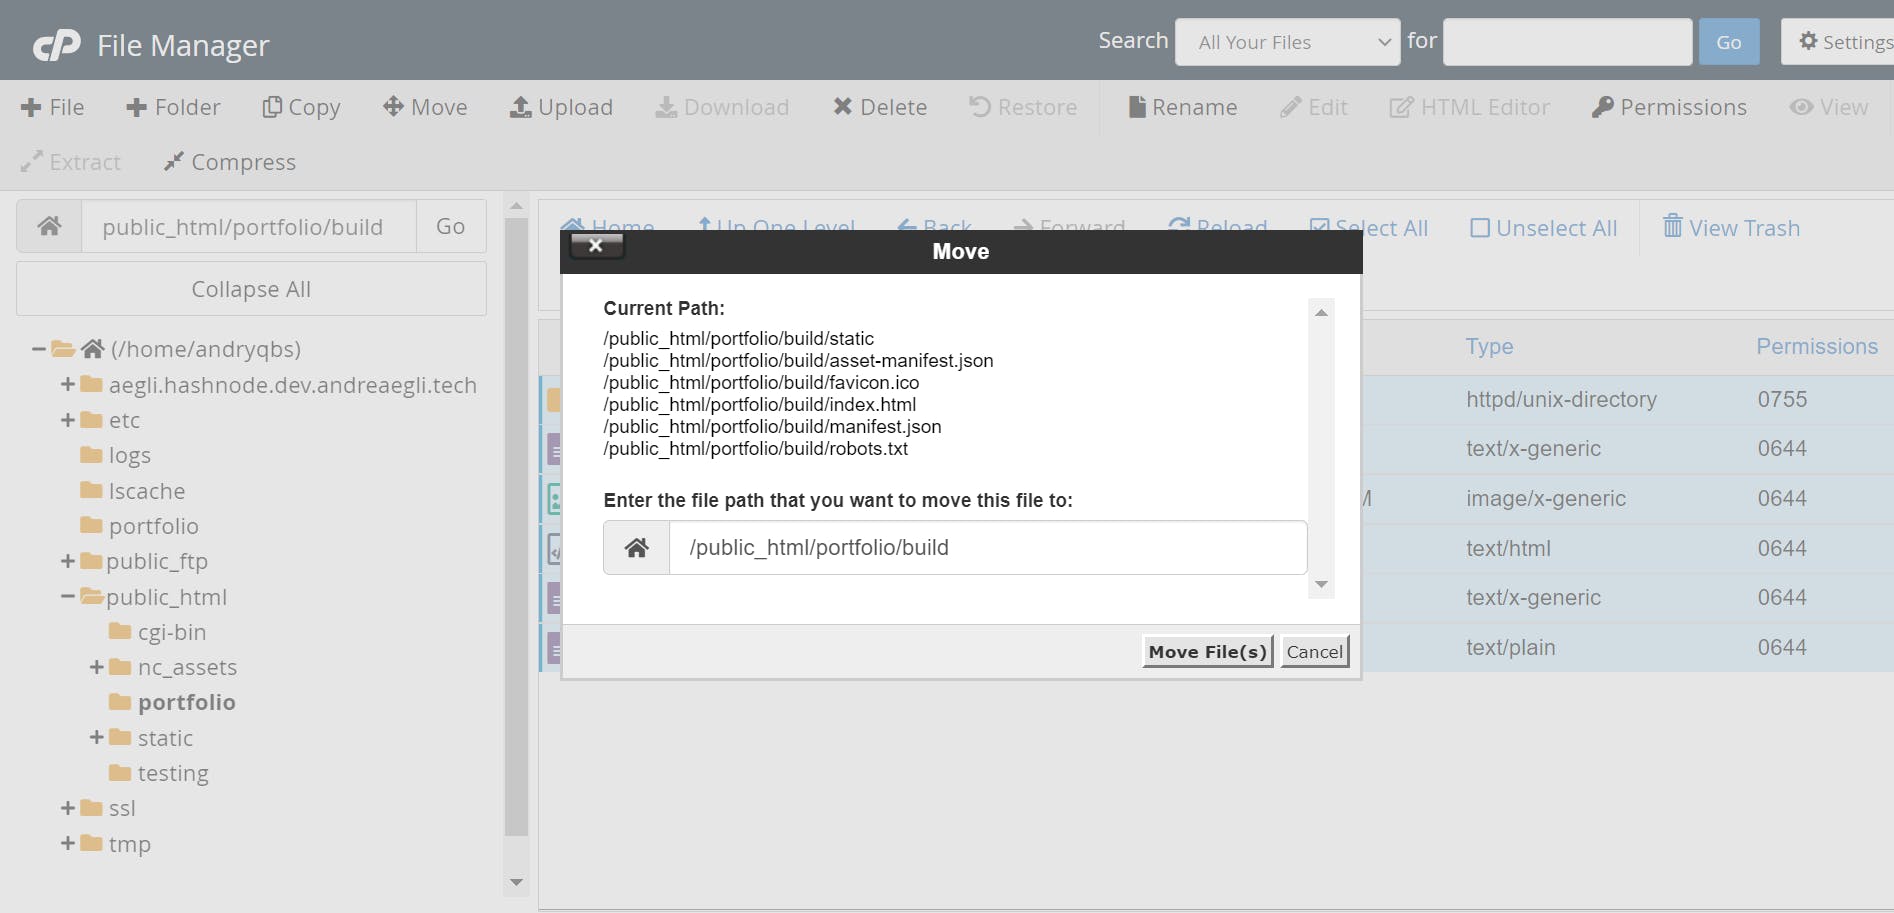
Enter the file path where you want to move your files to and click Move File(s). My suggestion would be to move the files to /public_html/. At least this is my personal standard practice and preference
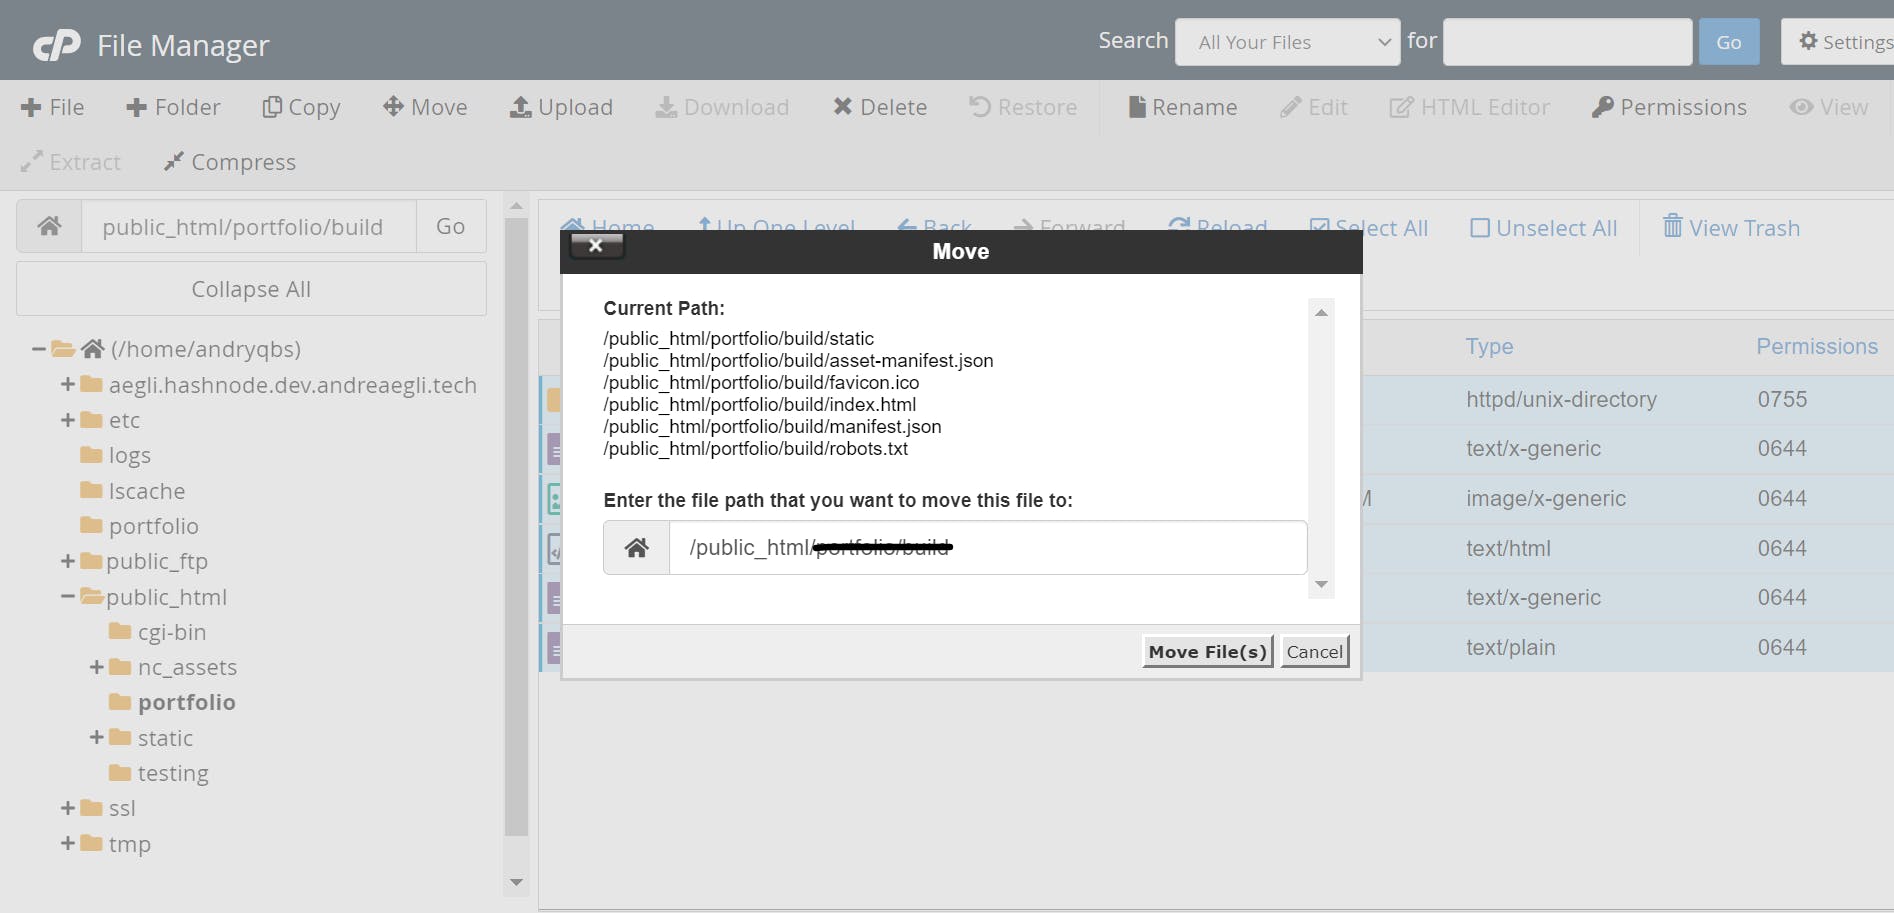
Guess what?!?! We're done!!!!!
🥳🥳🥳🥳🥳🥳🥳🥳🥳🥳🥳🥳🥳🥳🥳🥳🥳🥳🥳
You did a great job and I truly hope my instructions were clear. I tried to be as detailed as possible because when I deployed my project for the first time, I had a few issues which I had to trial & error myself in order to make everything work properly.
Go check out your deployed website and let me know how it worked. If you need help, drop me a line.
#namecheap #namecheapdeployment

